Brother SE-400 Instruction Manual: A Comprehensive Guide
This manual provides detailed guidance for the Brother SE-400, assisting users with setup, operation, troubleshooting, and maintenance of their sewing and embroidery machine.
Welcome to the world of creative possibilities with the Brother SE-400 combination sewing and embroidery machine! This versatile machine empowers both beginners and experienced crafters to bring their visions to life. The SE-400 seamlessly blends practical sewing functions with the artistry of embroidery, offering a complete creative solution.
This instruction manual serves as your comprehensive guide, walking you through every aspect of the machine – from initial setup and basic operations to advanced features and troubleshooting. Whether you’re stitching garments, quilting masterpieces, or personalizing items with intricate embroidery designs, this manual will ensure a smooth and enjoyable experience. Explore the built-in designs, connect to a computer for expanded creativity, and discover a wealth of resources to enhance your skills.
Understanding the SE-400’s Key Features
The Brother SE-400 boasts a remarkable array of features designed for both sewing and embroidery enthusiasts. It includes a generous 4×4 inch embroidery area, perfect for adding personalized touches to various projects. A built-in library of 70 embroidery designs, 10 frame designs, and 98 stitch patterns provides immediate creative options.
The machine features an automatic needle threader and a quick-set bobbin, simplifying setup and saving valuable time. Its user-friendly LCD touchscreen display guides you through selections and settings. Connectivity options allow importing designs via USB. The SE-400 is designed for ease of use, making it ideal for beginners while offering enough power and versatility to satisfy experienced users.
Setting Up Your Brother SE-400
Proper setup is crucial for optimal performance. This section details unboxing, powering on, threading, and bobbin winding procedures for your new machine.
Unboxing and Initial Inspection
Carefully unpack your Brother SE-400 sewing and embroidery machine, ensuring all components are present. Verify the contents against the included parts list – this typically includes the machine itself, power cord, foot controller, various presser feet, bobbins, needle set, embroidery hoop(s), screwdriver, cleaning brush, and this instruction manual.
Inspect the machine for any visible damage sustained during shipping. Check for dents, scratches, or loose parts. Retain the original packaging for potential future transport or warranty claims. Confirm the machine’s model number matches your purchase. Familiarize yourself with the location of key components like the bobbin winder, needle plate, and LCD screen. A thorough initial inspection prevents issues later on.
Powering On and Basic Settings
Connect the power cord to the machine and a grounded outlet. Press the power button to turn on the Brother SE-400. The LCD screen will illuminate, displaying the main menu. Initially, set the language preference and date/time. Navigate these settings using the directional buttons and confirm selections with the ‘Set’ or ‘Enter’ button.
Adjust the screen brightness to a comfortable level. Explore the initial setup options, which may include a test stitch function to verify basic operation. Familiarize yourself with the menu structure – it’s crucial for accessing advanced features. Ensure the machine is set to the correct voltage for your region. These basic settings establish a foundation for seamless operation.
Threading the Machine
Begin by raising the presser foot; this opens the tension discs for proper threading. Guide the thread from the spool, through the thread guide on top of the machine, and down through the first thread guide. Follow the numbered diagram printed on the machine – it’s essential for correct routing. Next, thread through the tension discs, ensuring it’s firmly seated between them.
Continue threading through the take-up lever and then down to the needle. Use the needle threader if needed, a helpful feature on the SE-400. Finally, thread the needle from front to back. A correctly threaded machine is vital for stitch quality and preventing issues like thread breakage. Double-check each step against the diagram.
Winding the Bobbin
Start by placing the thread spool on the spool pin. Then, draw the thread through the thread guide and around the tension disc for bobbin winding. Next, thread the end of the thread through the central hole of the bobbin, ensuring it’s securely in place. Place the bobbin onto the bobbin winder spindle.
Push the bobbin winder to the right and engage the bobbin winding mechanism. Press the foot pedal gently to start winding. The machine will automatically stop when the bobbin is full. Remove the bobbin, cut the thread, and insert it into the bobbin case, ensuring it rotates freely. Proper bobbin winding is crucial for even stitching.
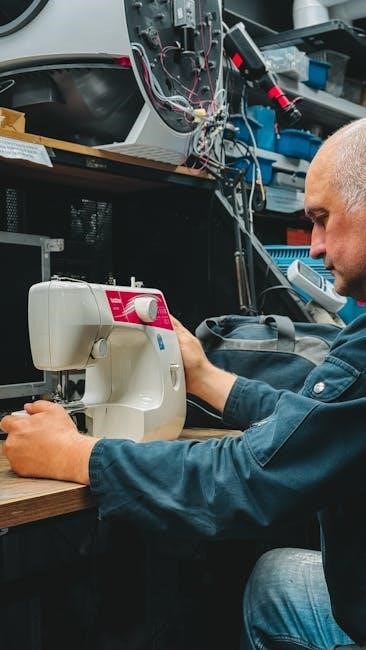
Basic Sewing Operations
Master fundamental techniques like stitch selection, length/width adjustments, and fabric/needle pairing for successful straight and zigzag stitching with your SE-400.
Selecting Stitch Patterns
The Brother SE-400 boasts a diverse range of built-in stitch patterns, catering to various sewing projects and creative applications. To select a stitch, utilize the stitch selection dial located on the machine’s front panel;
This dial allows you to effortlessly scroll through available options, displayed numerically and often with a visual representation of the stitch. Beyond standard straight and zigzag stitches, explore decorative stitches, buttonhole functions, and quilting patterns.
Refer to the stitch chart within your instruction manual for a comprehensive overview of each stitch’s purpose and recommended settings. Experiment with different stitches on scrap fabric to understand their unique characteristics before applying them to your final project.
Remember to consider the fabric type and desired effect when choosing a stitch pattern for optimal results.
Adjusting Stitch Length and Width
Precise control over stitch length and width is crucial for achieving professional-looking results with your Brother SE-400. The machine features dedicated dials or buttons for adjusting these parameters, typically located near the stitch selection area.
Stitch length determines the distance between each stitch, influencing the fabric’s durability and appearance. Shorter stitch lengths are ideal for delicate fabrics and intricate details, while longer lengths are suitable for heavier materials and quicker sewing.
Stitch width controls the breadth of zigzag or decorative stitches, impacting the pattern’s density and coverage.
Always test your settings on scrap fabric before sewing your project to ensure the desired outcome.
Fabric Selection and Needle Types
Choosing the correct fabric and needle combination is paramount for successful sewing with the Brother SE-400. Different fabrics require specific needle types to prevent damage and ensure optimal stitch quality.
Universal needles are suitable for woven fabrics like cotton and linen. Ballpoint needles are designed for knit fabrics, preventing skipped stitches and fabric runs. Denim needles are robust enough to penetrate heavy-duty materials like denim and canvas.
Always consider the fabric’s weight and weave when selecting a needle.
A finer needle is best for lightweight fabrics, while a heavier needle is needed for thicker materials.
Refer to the Brother SE-400 manual for a comprehensive needle guide.
Sewing Straight Stitches
Mastering the straight stitch is fundamental to sewing with the Brother SE-400. Begin by selecting the desired straight stitch pattern on the machine’s control panel.
Adjust the stitch length according to your fabric and project requirements; shorter stitches are ideal for delicate fabrics, while longer stitches suit heavier materials.
Ensure the presser foot is lowered before commencing sewing.
Gently guide the fabric under the needle, maintaining a consistent speed and direction.
Use the guide markings on the needle plate to maintain a straight seam allowance.
Practice on scrap fabric to refine your technique before working on your final project.
Sewing Zigzag Stitches
The Brother SE-400’s zigzag stitch offers versatility for various applications, from finishing raw edges to creating decorative effects. Select a zigzag stitch pattern from the machine’s options.
Adjust both the stitch length and width to achieve the desired appearance. A wider stitch is suitable for securing fabric edges, while a narrower stitch is ideal for decorative stitching.
Experiment with different stitch widths and lengths on scrap fabric to understand their impact.
Zigzag stitches are excellent for preventing fabric fraying and adding stretch to seams.
Use a zigzag foot for optimal results when sewing thicker fabrics or multiple layers;
Practice consistent fabric feeding for a uniform zigzag line.
Embroidery Functions
Explore the SE-400’s embroidery capabilities, including design loading, fabric hooping, and precise settings adjustments for stunning, personalized embroidery projects.
Loading Embroidery Designs
The Brother SE-400 offers several methods for loading embroidery designs, expanding your creative possibilities. You can directly import designs from a USB flash drive, ensuring compatibility with various file formats.
Alternatively, connect the machine to a computer via USB to utilize the Brother PE-Design software or other compatible embroidery software for seamless design transfer.
The machine supports popular embroidery file types, allowing for a wide range of design choices. Ensure the USB drive is formatted correctly (FAT32) for optimal performance.
Once connected, navigate the machine’s menu to select the USB drive and browse for your desired design. The SE-400’s intuitive interface simplifies the design selection process.
Hooping the Fabric
Properly hooping your fabric is crucial for successful embroidery with the Brother SE-400. Begin by loosening the hoop screws to separate the inner and outer rings. Place your fabric tightly over the inner ring, ensuring it’s centered and smooth.
Carefully position the outer ring over the fabric and inner ring, pressing down firmly. Tighten the hoop screws evenly to secure the fabric, achieving a drum-like tension.
Avoid over-tightening, which can distort the fabric, or under-tightening, leading to puckering during embroidery.
The hoop should be stable and prevent fabric shifting during the stitching process.
Embroidery Settings and Adjustments
The Brother SE-400 offers numerous embroidery settings for optimal results. Adjust the embroidery speed to suit your fabric and design complexity; slower speeds are ideal for intricate designs or delicate materials.
Fine-tune the thread tension to prevent looping or breakage, referencing the manual’s guidelines for different thread types.
Explore the stitch density settings to control the fill of your embroidery, impacting its appearance and durability.
Utilize the pattern repeat function for creating continuous designs.
Experiment with the needle settings to achieve the desired stitch quality and prevent fabric damage.
Troubleshooting Common Issues
This section details solutions for frequent problems like thread breakage, bobbin errors, and machine error codes, ensuring smooth operation of your SE-400.
Thread Breakage Problems
Frequent thread breakage on the Brother SE-400 can stem from several causes. First, ensure proper threading – follow the diagram in the manual meticulously, verifying the thread is seated correctly in all tension discs and guides.
Next, check the needle; a bent or damaged needle is a common culprit. Select the correct needle type and size for your fabric weight. Incorrect tension settings also contribute to breakage; adjust both upper and bobbin tension gradually.
Poor quality thread can weaken and snap easily. Finally, lint buildup within the tension areas can impede smooth thread flow. Regularly clean these areas with a small brush to maintain optimal performance and prevent frustrating interruptions during your sewing or embroidery projects.
Bobbin Issues and Solutions
Bobbin-related problems on the Brother SE-400 often involve inconsistent stitching or the machine stopping unexpectedly. Ensure the bobbin is wound evenly and not too tightly or loosely. Use only Brother-approved bobbins for optimal performance, as generic bobbins can cause tension issues.
If the bobbin case is jammed, carefully remove it and clean out any lint or tangled threads. Reinsert the bobbin case correctly, ensuring it clicks into place. Check the bobbin tension; a slightly too-tight bobbin can cause thread breakage and skipped stitches.
Finally, verify the bobbin thread is correctly threaded through the tension spring. Consistent cleaning and proper bobbin winding are key to avoiding these common frustrations.
Machine Error Codes and Meanings
The Brother SE-400 utilizes error codes to diagnose internal issues. Code “E01” typically indicates a problem with the upper threading, requiring re-threading. “E02” suggests a bobbin thread issue – check winding and insertion. “E03” often signals a mechanical malfunction, potentially needing professional service.
“E04” relates to hoop detection problems during embroidery; ensure the hoop is securely attached. “E05” points to a potential issue with the presser foot, verifying it’s correctly installed; Refer to the full manual for a complete list and detailed explanations.
Ignoring error codes can lead to further damage. Document the code before attempting fixes, and if unsure, contact Brother support for assistance.
Maintenance and Care
Regular cleaning, proper lubrication, and careful storage are crucial for extending the life and maintaining optimal performance of your Brother SE-400.
Cleaning the Brother SE-400
Maintaining a clean machine is vital for smooth operation and longevity. Always power off and unplug the SE-400 before cleaning. Use a soft brush to remove lint and dust from the bobbin area, feed dogs, and around the needle plate.
A small vacuum cleaner with a brush attachment can also be helpful. Clean the exterior with a slightly damp cloth; avoid harsh chemicals. Regularly clean the thread guides to prevent thread breakage. For the embroidery unit, carefully brush away any accumulated fabric fibers or thread remnants.
Pay attention to the needle area, ensuring no lint obstructs the needle’s movement. Consistent cleaning prevents jams and ensures accurate stitching and embroidery results.
Lubrication Guidelines
The Brother SE-400 requires minimal oiling, and over-lubrication can cause more harm than good. Generally, avoid oiling unless specifically instructed in the full service manual (not the standard user guide).
If oiling is necessary – typically for internal mechanisms during servicing – use only a high-quality sewing machine oil. Apply a very small drop to the designated oiling points, as indicated in the service manual.
Avoid getting oil on the feed dogs or any areas that come into contact with the fabric, as this can stain. Regular cleaning, as outlined previously, often negates the need for frequent oiling. Improper lubrication can void your warranty.
Long-Term Storage Instructions
If storing your Brother SE-400 for an extended period, thorough preparation is crucial. First, completely clean the machine, removing all lint, dust, and thread remnants. Lower the presser foot and cover the machine with the provided dust cover, or a suitable alternative.
Remove the bobbin and needle to prevent potential damage. Disconnect the power cord and store it safely. Ideally, store the machine in a cool, dry place, away from direct sunlight and extreme temperatures.
Avoid storing in damp environments like basements or attics. Periodically (every 6-12 months) check the machine for any signs of corrosion or deterioration.

Advanced Features & Resources
Explore built-in designs, computer connectivity options, and extensive online support, including downloadable manuals and helpful resources for your Brother SE-400.
Using the Built-in Designs
The Brother SE-400 boasts a diverse library of pre-programmed embroidery designs, offering creative possibilities for various projects. Access these designs directly through the machine’s LCD screen, navigating categories like floral, frames, and alphabets.
To utilize a built-in design, select it from the menu, adjust its size and placement on the fabric using the editing tools, and then initiate the embroidery process. The machine supports multiple formats, ensuring compatibility with a wide range of patterns.
Experiment with combining designs, altering colors, and mirroring patterns to personalize your creations. Remember to consult the design reference guide for detailed information on each design’s specifications and recommended stabilizers.
Connecting to a Computer
The Brother SE-400 allows connectivity to a computer via USB, unlocking access to a broader range of embroidery designs and software capabilities. Download and install the necessary Brother embroidery software onto your computer to transfer designs seamlessly.
Ensure the machine is powered off during the connection process. Connect the USB cable to both the SE-400 and your computer. The machine will appear as a removable drive on your computer, enabling easy file transfer.
Utilize the software to edit designs, create custom patterns, and manage your embroidery library. Regularly update the software for optimal performance and compatibility.
Finding Additional Support & Manuals (PDF)
Brother provides extensive online resources for SE-400 owners, including downloadable PDF manuals and frequently asked questions. Visit the official Brother website’s support section and navigate to the SE-400 model page for access.

Numerous online forums and communities dedicated to Brother sewing and embroidery machines offer valuable troubleshooting tips and user-shared experiences. YouTube channels also host tutorials demonstrating various SE-400 features and techniques.
Should you require direct assistance, Brother’s customer support team is available via phone or email. Keep your machine’s serial number handy when contacting support for efficient service.