
Discover the simplicity of building sturdy, affordable chairs using readily available 2×4 lumber! PDF plans offer detailed instructions,
making this project accessible for all skill levels.
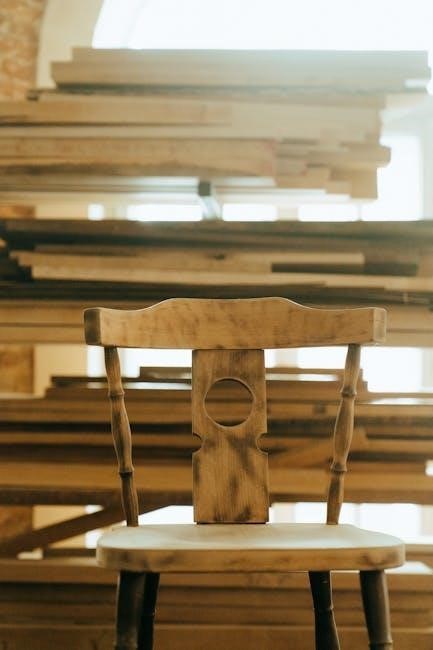
Why Build a 2×4 Chair?
Constructing a 2×4 chair is a fantastic woodworking project offering both practicality and cost-effectiveness. Utilizing 2x4s minimizes material expenses, making it budget-friendly. PDF plans simplify the process, providing clear guidance for builders of any experience level. These chairs are remarkably durable, suitable for both indoor and outdoor use.
Furthermore, building your own allows for customization – stain, paint, or add cushions to match your style. It’s a rewarding experience, yielding a functional piece of furniture you created yourself!
Benefits of Using PDF Plans
PDF plans for 2×4 chairs offer numerous advantages for builders. They provide detailed, step-by-step instructions, often including visual diagrams for clarity. Accessibility is key – easily downloadable and viewable on any device. PDF format ensures consistent presentation, avoiding errors found in copied plans.
Moreover, many plans include material lists and cutting diagrams, streamlining the build process. They often cater to various skill levels, from beginner to advanced, offering diverse design options.

Materials and Tools Required
Essential supplies include 2×4 lumber, screws, wood glue, and finishing materials. Common tools are a saw, drill, measuring tape, and safety glasses.
Lumber Selection: Choosing the Right 2x4s
Selecting high-quality 2x4s is crucial for a durable chair. Look for lumber that is straight, free of knots, and without significant warping or cracks. Pressure-treated lumber is ideal for outdoor projects, resisting rot and insects. Kiln-dried lumber minimizes shrinkage after construction. Consider the wood species; pine is affordable, while cedar offers natural weather resistance. Check local building codes for specific requirements. Ensure the 2x4s are consistently sized for accurate cuts and a stable build, referencing your chosen PDF plan’s specifications.
Essential Tools for Construction
Successfully building a 2×4 chair requires a few key tools. A circular saw or miter saw ensures accurate cuts. A drill and screwdriver are essential for assembling the frame. Measuring tape, a square, and a pencil guarantee precision. Sandpaper prepares the wood for finishing. Clamps hold pieces securely during glue-up. Safety glasses and ear protection are non-negotiable. Your PDF plan may suggest specific tools, but these basics will cover most builds.
Safety Gear: Protecting Yourself During the Build
Prioritize safety throughout your 2×4 chair project! Safety glasses are crucial to shield your eyes from flying debris. Ear protection, like earmuffs, minimizes noise damage. A dust mask or respirator prevents inhalation of wood particles. Work gloves improve grip and protect hands. Sturdy footwear provides stability. Always unplug power tools before adjustments. Review your PDF plan for specific safety recommendations and work in a well-ventilated area.
Understanding 2×4 Chair Plans
PDF plans provide visual diagrams and step-by-step instructions for constructing your chair. Carefully review all dimensions and material lists before beginning construction.
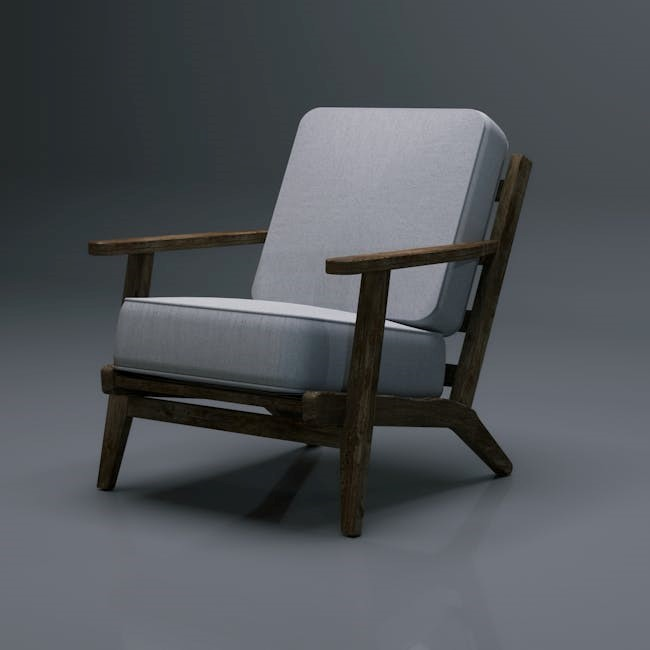
Types of 2×4 Chair Designs (Adirondack, Rustic, Modern)
Numerous 2×4 chair designs cater to diverse aesthetic preferences. Adirondack chairs, known for their classic outdoor appeal, often feature angled backs for comfort. Rustic designs embrace a more natural, unfinished look, highlighting the wood’s character.
Modern 2×4 chairs prioritize clean lines and minimalist forms, fitting seamlessly into contemporary spaces. PDF plans will specify the design, influencing lumber cuts and assembly techniques. Choosing a plan aligned with your style is crucial for a satisfying build.
Reading and Interpreting PDF Plans
Successfully building from 2×4 chair PDF plans requires understanding their components. Pay close attention to the materials list, ensuring you have all necessary lumber and hardware. Diagrams illustrate assembly steps; familiarize yourself with symbols and views.
Measurements are critical – double-check all dimensions before cutting. Bill of materials details quantities, while cut lists specify lumber lengths. Understanding these elements prevents errors and ensures a structurally sound, aesthetically pleasing chair.
Key Dimensions and Measurements
2×4 chair PDF plans detail crucial dimensions for a comfortable and stable build; Seat height typically ranges from 17-19 inches, while seat depth averages 18-20 inches. Backrest angle impacts comfort; plans often specify around 100-110 degrees.
Overall chair width and height vary by design, but plans provide precise measurements. Leg length determines chair height, and accurate cuts are essential for level seating. Refer to the plan’s specifications for all critical dimensions.

Step-by-Step Construction Guide
Follow your PDF plan closely, starting with precise lumber cuts. Assemble the frame securely, then attach the seat and backrest for a finished chair!
Cutting the Lumber According to the Plan
Precise cuts are paramount for a stable and aesthetically pleasing 2×4 chair. Your PDF plans will detail each lumber piece’s required length and angle. Utilize a measuring tape, pencil, and speed square to mark accurately before cutting. A circular saw or miter saw ensures straight, clean cuts. Double-check measurements before each cut to avoid costly errors and wasted material. Remember safety glasses and ear protection are essential during this stage. Following the plan meticulously guarantees a successful build!
Assembling the Chair Frame
Refer to your PDF plans for the correct order of assembly. Typically, this involves joining the legs, side rails, and front/back supports. Employ wood screws or nails, ensuring they are appropriately sized for 2×4 lumber. Pre-drilling pilot holes prevents splitting the wood. Utilize clamps to hold pieces securely while fastening. Check for squareness frequently – a slightly off frame impacts overall stability. A robust frame is the foundation of a durable 2×4 chair!
Attaching the Seat and Backrest
Consult your PDF plans for specific seat and backrest attachment methods. Typically, these components are secured to the chair frame using screws. Ensure proper alignment for comfortable seating. Consider adding support blocks underneath the seat for increased strength. Angled backrests enhance ergonomics. Pre-drilling is crucial to avoid wood splitting. Double-check all connections for tightness and stability before proceeding to finishing steps – a secure attachment is paramount!

Finishing and Customization
Elevate your 2×4 chair with sanding, staining, painting, or sealant! PDF plans often suggest finishes, but personalize with cushions for added comfort.
Sanding and Preparing the Wood Surface
Proper surface preparation is crucial for a beautiful, lasting finish on your 2×4 chair. Begin with a coarse-grit sandpaper (80-100) to remove any rough edges or imperfections. PDF plans may detail specific sanding recommendations. Progress to medium-grit (120-150) and finally fine-grit (220) for a smooth texture.
Thoroughly remove all sanding dust with a tack cloth or vacuum. This ensures optimal adhesion for stains, paints, or sealants. Addressing splinters and ensuring a level surface will dramatically improve the final aesthetic and feel of your handcrafted chair.
Applying Stain, Paint, or Sealant
Once the wood surface is sanded and clean, you can enhance its appearance and protect it from the elements. PDF plans might suggest specific finishes. Stain highlights the wood grain, while paint offers vibrant color options. Always apply thin, even coats, following the manufacturer’s instructions.
For outdoor chairs, a sealant is essential to guard against moisture and UV damage. Allow each coat to dry completely before applying the next, and consider multiple coats for increased durability and a professional look.
Adding Comfort: Cushions and Pillows
While 2×4 chairs are structurally sound, adding cushions and pillows significantly enhances comfort. PDF plans often don’t detail cushion specifics, allowing for personalization. Consider weather-resistant fabrics for outdoor use, and choose thicknesses based on desired support.
Secure cushions with straps or ties to prevent slipping. Pillows add a decorative touch and extra relaxation. Experiment with colors and patterns to complement your chair’s finish and outdoor space!
Troubleshooting Common Issues
PDF plans are great, but issues arise! Address warped lumber, instability, or loose joints promptly for a safe, durable 2×4 chair build.
Dealing with Warped or Cracked Lumber
Unfortunately, even with careful selection, lumber can sometimes be warped or cracked. Inspect each 2×4 thoroughly before beginning construction, referencing your PDF plans for required lengths. Minor warps might be corrected with clamps and careful securing during assembly, but severely warped pieces should be replaced.
For cracks, assess their severity; small surface cracks are often cosmetic, while larger cracks compromise structural integrity. If a crack impacts a critical joint, discard the piece and select a new one to ensure a safe and stable chair. Prioritize quality lumber for lasting results!
Addressing Stability Problems
If your completed 2×4 chair feels wobbly, revisit your PDF plan’s assembly instructions. Ensure all joints are tightly secured with screws or fasteners, and that corners are square. Check for any gaps or misalignments that could contribute to instability.
Adding corner braces or reinforcing key joints can significantly improve stability. Consider using wood glue in conjunction with fasteners for a stronger, more durable bond. A level surface is crucial; uneven flooring can appear as chair instability.
Fixing Loose Joints
Loose joints are common when following 2×4 chair PDF plans, especially for beginners. First, identify the affected joint and inspect the fasteners; Tighten existing screws; if they spin freely, replace them with longer or wider screws.
Wood glue, injected into the joint and clamped until dry, can restore strength. For severely loose joints, consider disassembling, re-gluing, and re-fastening. Always refer to your plan for correct joint orientation during reassembly.

Finding Free and Paid 2×4 Chair Plans (PDF)
Numerous websites offer free 2×4 chair PDF plans, while paid plans often provide greater detail, variations, and enhanced support for builders.
Popular Websites Offering Free Plans
Many online resources provide complimentary 2×4 chair plans in PDF format; Websites like Track.global and 17TRACK, while primarily package trackers, demonstrate the ease of accessing online resources;
Parcel Monitor and Informed Delivery highlight the availability of information. Searching specifically for “free 2×4 chair plans PDF” yields results from woodworking forums, personal blogs, and occasionally, lumber retailer websites.
However, be mindful of plan quality and completeness; some free plans may lack detailed instructions or necessary dimensions. Always double-check measurements before cutting!
Benefits of Purchasing Detailed Paid Plans
While free 2×4 chair PDF plans are available, investing in paid plans often provides significant advantages. Similar to tracking packages with services like FedEx or UPS – requiring precise information – detailed plans offer accuracy.
Paid plans typically include comprehensive material lists, precise cut diagrams, and step-by-step instructions with visual aids. They often feature multiple design variations and address potential construction challenges.
This reduces errors, saves time, and ultimately results in a more professional and structurally sound finished chair, justifying the cost.
Advanced Techniques & Modifications
Elevate your 2×4 chair builds! Explore adding armrests, crafting curved backrests, or mastering joinery like pocket holes for enhanced durability.
Adding Armrests
Enhance your 2×4 chair’s comfort and aesthetic appeal by incorporating armrests. PDF plans often detail various armrest styles, from simple, straight supports to more contoured designs. Consider the chair’s overall style when selecting your armrest design.
Properly angled and securely attached armrests provide a relaxing place to rest your arms. Ensure robust connections using screws, bolts, or even mortise and tenon joinery for maximum stability. Carefully measure and cut the lumber for the armrests, ensuring they complement the chair’s dimensions and provide comfortable support.
Creating Curved Backrests
Elevate your 2×4 chair’s design with a gracefully curved backrest! PDF plans may offer templates or detailed instructions for achieving this elegant shape. Bending 2x4s requires careful technique; steaming or using a bending jig are common methods.
Alternatively, you can create a curved effect by laminating multiple thin strips of wood together. Precise cutting and secure attachment to the chair frame are crucial for both comfort and structural integrity. A curved backrest significantly enhances the chair’s ergonomic design.
Incorporating Joinery Techniques (Pocket Holes, Mortise & Tenon)
PDF 2×4 chair plans often showcase various joinery methods for enhanced strength and aesthetics. Pocket hole joinery is a quick and easy option, ideal for beginners, providing strong connections with minimal tools.
For a more traditional and robust build, mortise and tenon joints offer superior durability. These require greater skill and precision but result in a visually appealing and incredibly sturdy chair. Choosing the right technique depends on your experience and desired outcome.
Maintaining Your 2×4 Chair
Regular cleaning and inspection are key to longevity! PDF plans often suggest protective sealants to shield against weather and minor damage, ensuring years of enjoyment.
Regular Cleaning and Inspection
Consistent upkeep dramatically extends your 2×4 chair’s lifespan. PDF plans frequently recommend wiping down the wood with a mild soap and water solution periodically to remove dirt and debris. Inspect joints annually for looseness; tighten screws as needed.
Look for any signs of cracking or warping, addressing them promptly to prevent further damage. Applying a fresh coat of sealant, as detailed in some PDF guides, provides continued protection against the elements and maintains the chair’s aesthetic appeal.
Protecting from the Elements
Outdoor 2×4 chairs, built from PDF plans, require diligent protection. Consider a weather-resistant finish – stain, paint, or sealant – to shield the wood from moisture, UV rays, and temperature fluctuations.
Storing the chair indoors during harsh winter months or prolonged periods of rain significantly extends its life. Using a protective cover when the chair is in use can also minimize exposure and maintain its appearance, as often detailed within comprehensive PDF guides.
Repairing Minor Damage
Even with careful construction from PDF plans, 2×4 chairs may experience minor wear. Small cracks can be filled with wood filler, sanded smooth, and refinished to blend seamlessly.
Loose joints, a common issue, often require re-gluing and clamping until dry, restoring stability. Regular inspection, guided by your PDF plan’s understanding of construction, allows for early detection and prevents issues from escalating into major repairs, preserving your chair’s longevity.

2×4 Chair Plan Variations
PDF plans unlock diverse designs – from classic Adirondack styles to modern, minimalist forms, and even scaled-down versions for children’s seating!
Outdoor vs. Indoor Chair Plans
PDF plans cater to different environments. Outdoor 2×4 chair plans prioritize weather resistance, often suggesting treated lumber and protective finishes like sealant or paint.
These designs frequently incorporate drainage features. Indoor plans, available as PDF downloads, may focus on aesthetics and comfort, utilizing different wood types and finishes.
Consider the chair’s intended location when selecting a plan; outdoor chairs need robust construction to withstand the elements, while indoor chairs can prioritize style and ergonomics.
Kid-Sized 2×4 Chair Plans
PDF plans for children’s 2×4 chairs emphasize safety and scaled dimensions. These plans typically feature lower seat heights and smaller overall sizes, perfectly proportioned for young users.
Rounded edges are often incorporated to minimize injury risks. Many PDF guides offer customizable options, allowing adjustments for growing children. Prioritize sturdy construction and non-toxic finishes when building for kids, ensuring a safe and enjoyable seating experience.

Resources and Further Learning
Explore online woodworking forums and communities for shared PDF plans and advice. Books and magazines offer detailed techniques to enhance your chair-building skills!
Online Forums and Communities
Engage with fellow woodworking enthusiasts in vibrant online forums dedicated to DIY projects! These platforms are treasure troves of free 2×4 chair plans in PDF format, often shared by experienced builders.
You’ll find valuable tips, troubleshooting advice, and inspiring modifications. Communities like Reddit’s r/woodworking and dedicated woodworking forums provide a space to ask questions, share your progress, and learn from others’ experiences.
Don’t hesitate to post pictures of your builds and receive constructive feedback – it’s a fantastic way to improve your skills!
Woodworking Books and Magazines
Expand your knowledge with comprehensive woodworking books and magazines! While not always focused solely on 2×4 chair plans in PDF form, they offer foundational skills crucial for success. Look for publications covering basic joinery, wood finishing, and project planning. Many include chair-building projects adaptable to 2×4 lumber.
These resources provide detailed diagrams, step-by-step instructions, and expert advice, supplementing online resources and fostering a deeper understanding of woodworking techniques.